Views
Overview
Views = Different ways to arrange and visualize your information.
Views replace the traditional document: Tana stores your information in an outline form—a document-agnostic way—that allows you to add views whenever you want and wherever you need it at the moment.
Switching between views is like toggling the same data between a Microsoft Word to Excel document: Changing views happens in a snap, and is effortless. Changing views doesn't undo the settings from the previous state; you can have several saved view states on the same set of information.
Basics
- Views work on nodes with children as well as Search nodes. Views do not work on Fields.
- Add it to any plain node by toggling "Show view options". This will visualize its child nodes in the selected view, and show a range of different options that change based on the chosen view.
- Available views include List, Table, Cards, Tabs and Calendar. More are in development and being added on a regular basis.
- Each view allows you to customize exactly how your information appears: Customize your views through view options like Filter, Group, Sort and Display. These options give you a lot of control over what you see, and how you see it.
Documentation
Add a view to a node
Add a view to a node using one of these methods:
- Command line: Cmd/Ctrl+K > Show view options, or Show as [view]
- Right-click on the node bullet > Show view options
This will bring up the View options next to the node. These view options apply to the child nodes, and the parent node becomes the "frame" that contains this view.
View options
If you are in your private workspace, Tana will save what view you left it on last, along with the options you made.
Options are saved per view, so even if you switch between views, it'll appear like the lsat time you looked at it.
Save view for everyone
If you're in a Workspace with two or more members, you have the option to save default view settings that all will see as default.
If any changes are made to the default setting by any member, they will see the green button to "Save for everyone", which will change the default saved view for everyone.
You can change the view as much as you want without clicking on the "save for everyone" button, and Tana will remember your personal settings for next time.
Remove all view options
You can remove all view options, which will delete all saved view settings:
- Command line: Cmd/Ctrl+K > Remove all view options
Pagination in views
Any collection of child nodes have a limit of displaying 100 nodes before it turns on pagination. This is on by default to ensure speed and performance. You can adjust the number if needed, though this might affect performance.
Pagination is set in node configuration. See Nodes and references on how to control pagination through Page File.
Content widths
Tana shows content using different width settings, which depends on what view type is activated. All nodes are set on Auto, and you have the choice to override it.
Access content widths in the dropdown on the top right corner of the panel.
Options:
- Auto: Switches between Medium and Full automatically. List view is set on Medium, the rest are set for Full.
- Medium: Provides a focused writing experience by setting generous white space on either side of the content
- Full: Expands content as wide as possible, filling the view.
View types
To apply a different view type
Click on "View types" to see a list of available view types. Switch between any of the view types below.
List view
Lists show nodes in outline view, with additional Filter/Sorting/Display capabilities that isn't possible without a view applied.
Available View options:
Table view
Tables show child nodes as rows and their fields as columns.
Add child nodes using the empty placeholder row at the bottom of the table, or add in-between rows using Enter at the end of any node on the left-most column like you're adding a node underneath it.
Adding a column to a table adds a field to the node. If the table is showing results based on a supertag search, Tana will suggest incorporating the new field into the supertag definition.
You can move columns around by:
- Using the keyboard shortcut Cmd/Ctrl+Shift+Arrow Up to move to the left; Arrow Down to move to the right
- Right-click the field header and choose Move column left/right
Calculations
Calculations are allowed in columns with numeric field type. Turn on by right-clicking on the field and choosing one of the options in the Calculation menu. When turned on, calculations show up on the bottom row. Filtering values will change the calculated value.
Choose between the following calculations:
- Sum: Adds all values up.
- Average: Adds all values and divides by count.
- Median: Sorts values and displays the value of the one that appears in the middle
- Min: Shows the smallest value in the list
- Max: Shows the largest value in the list
- Count all: Counts all rows and returns this value
- Count values: Counts all rows with numbers in them and returns this value
- Count unique: Counts number of unique numbers and returns this value
Available View options:
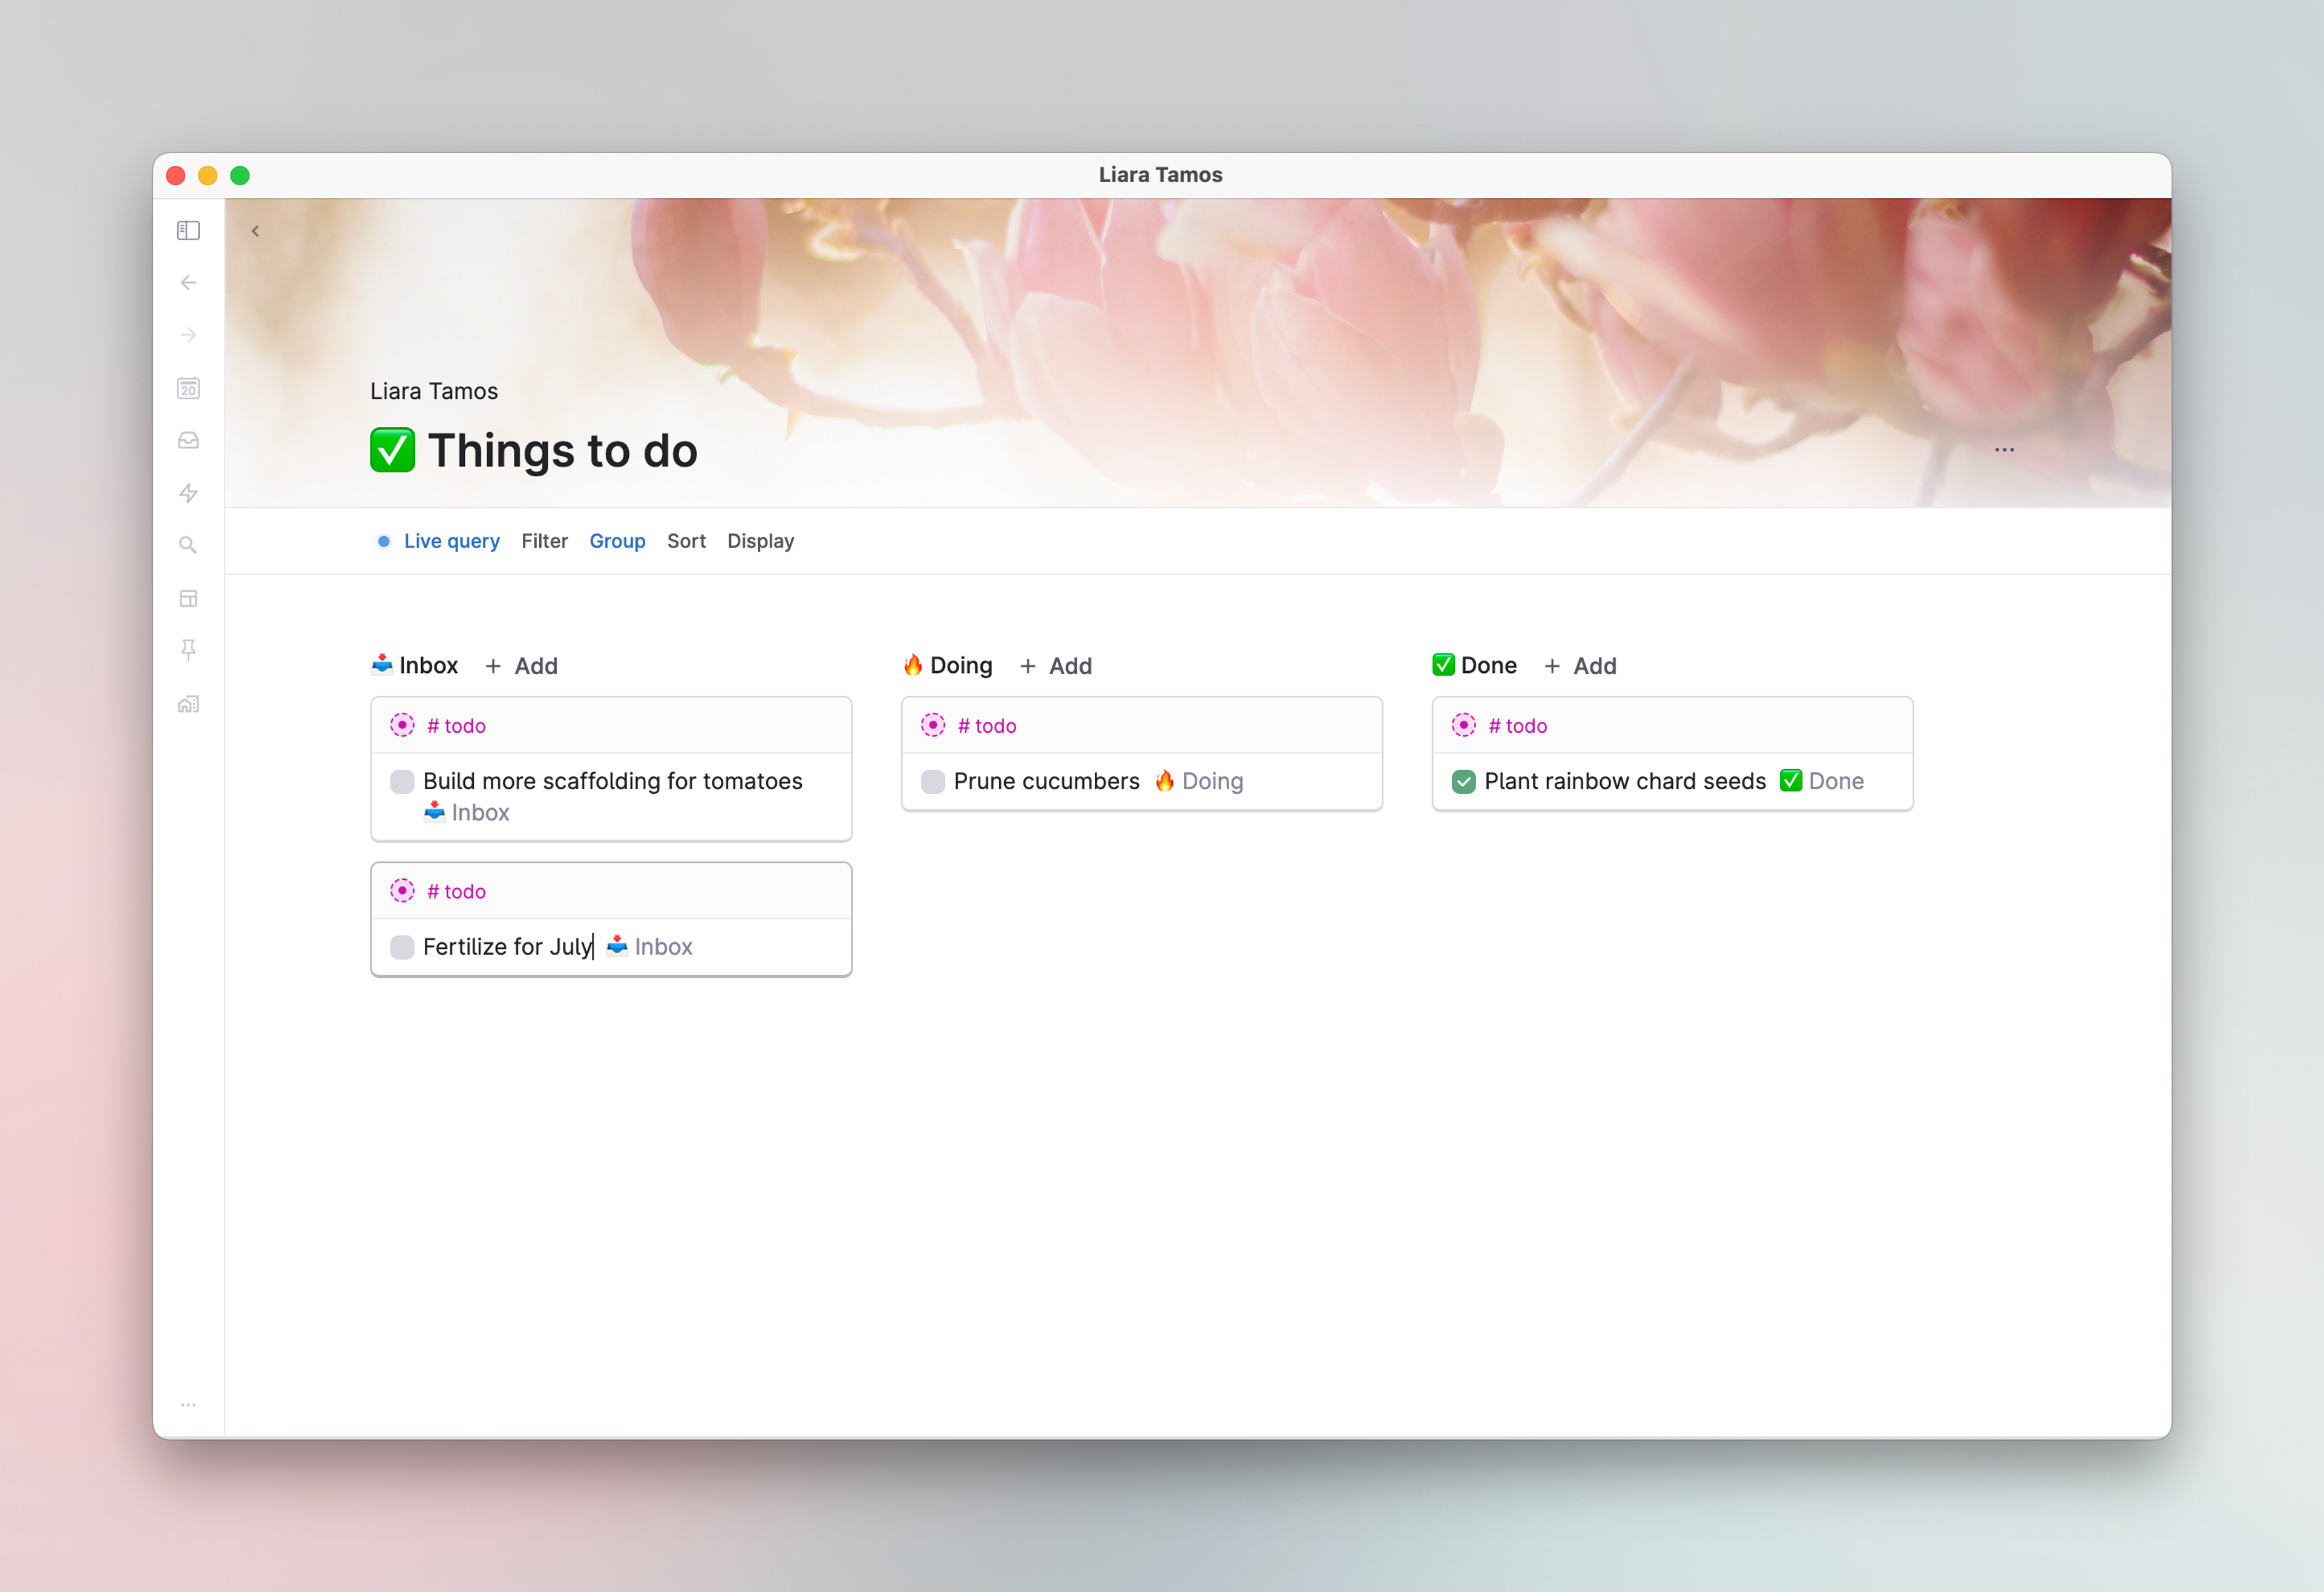
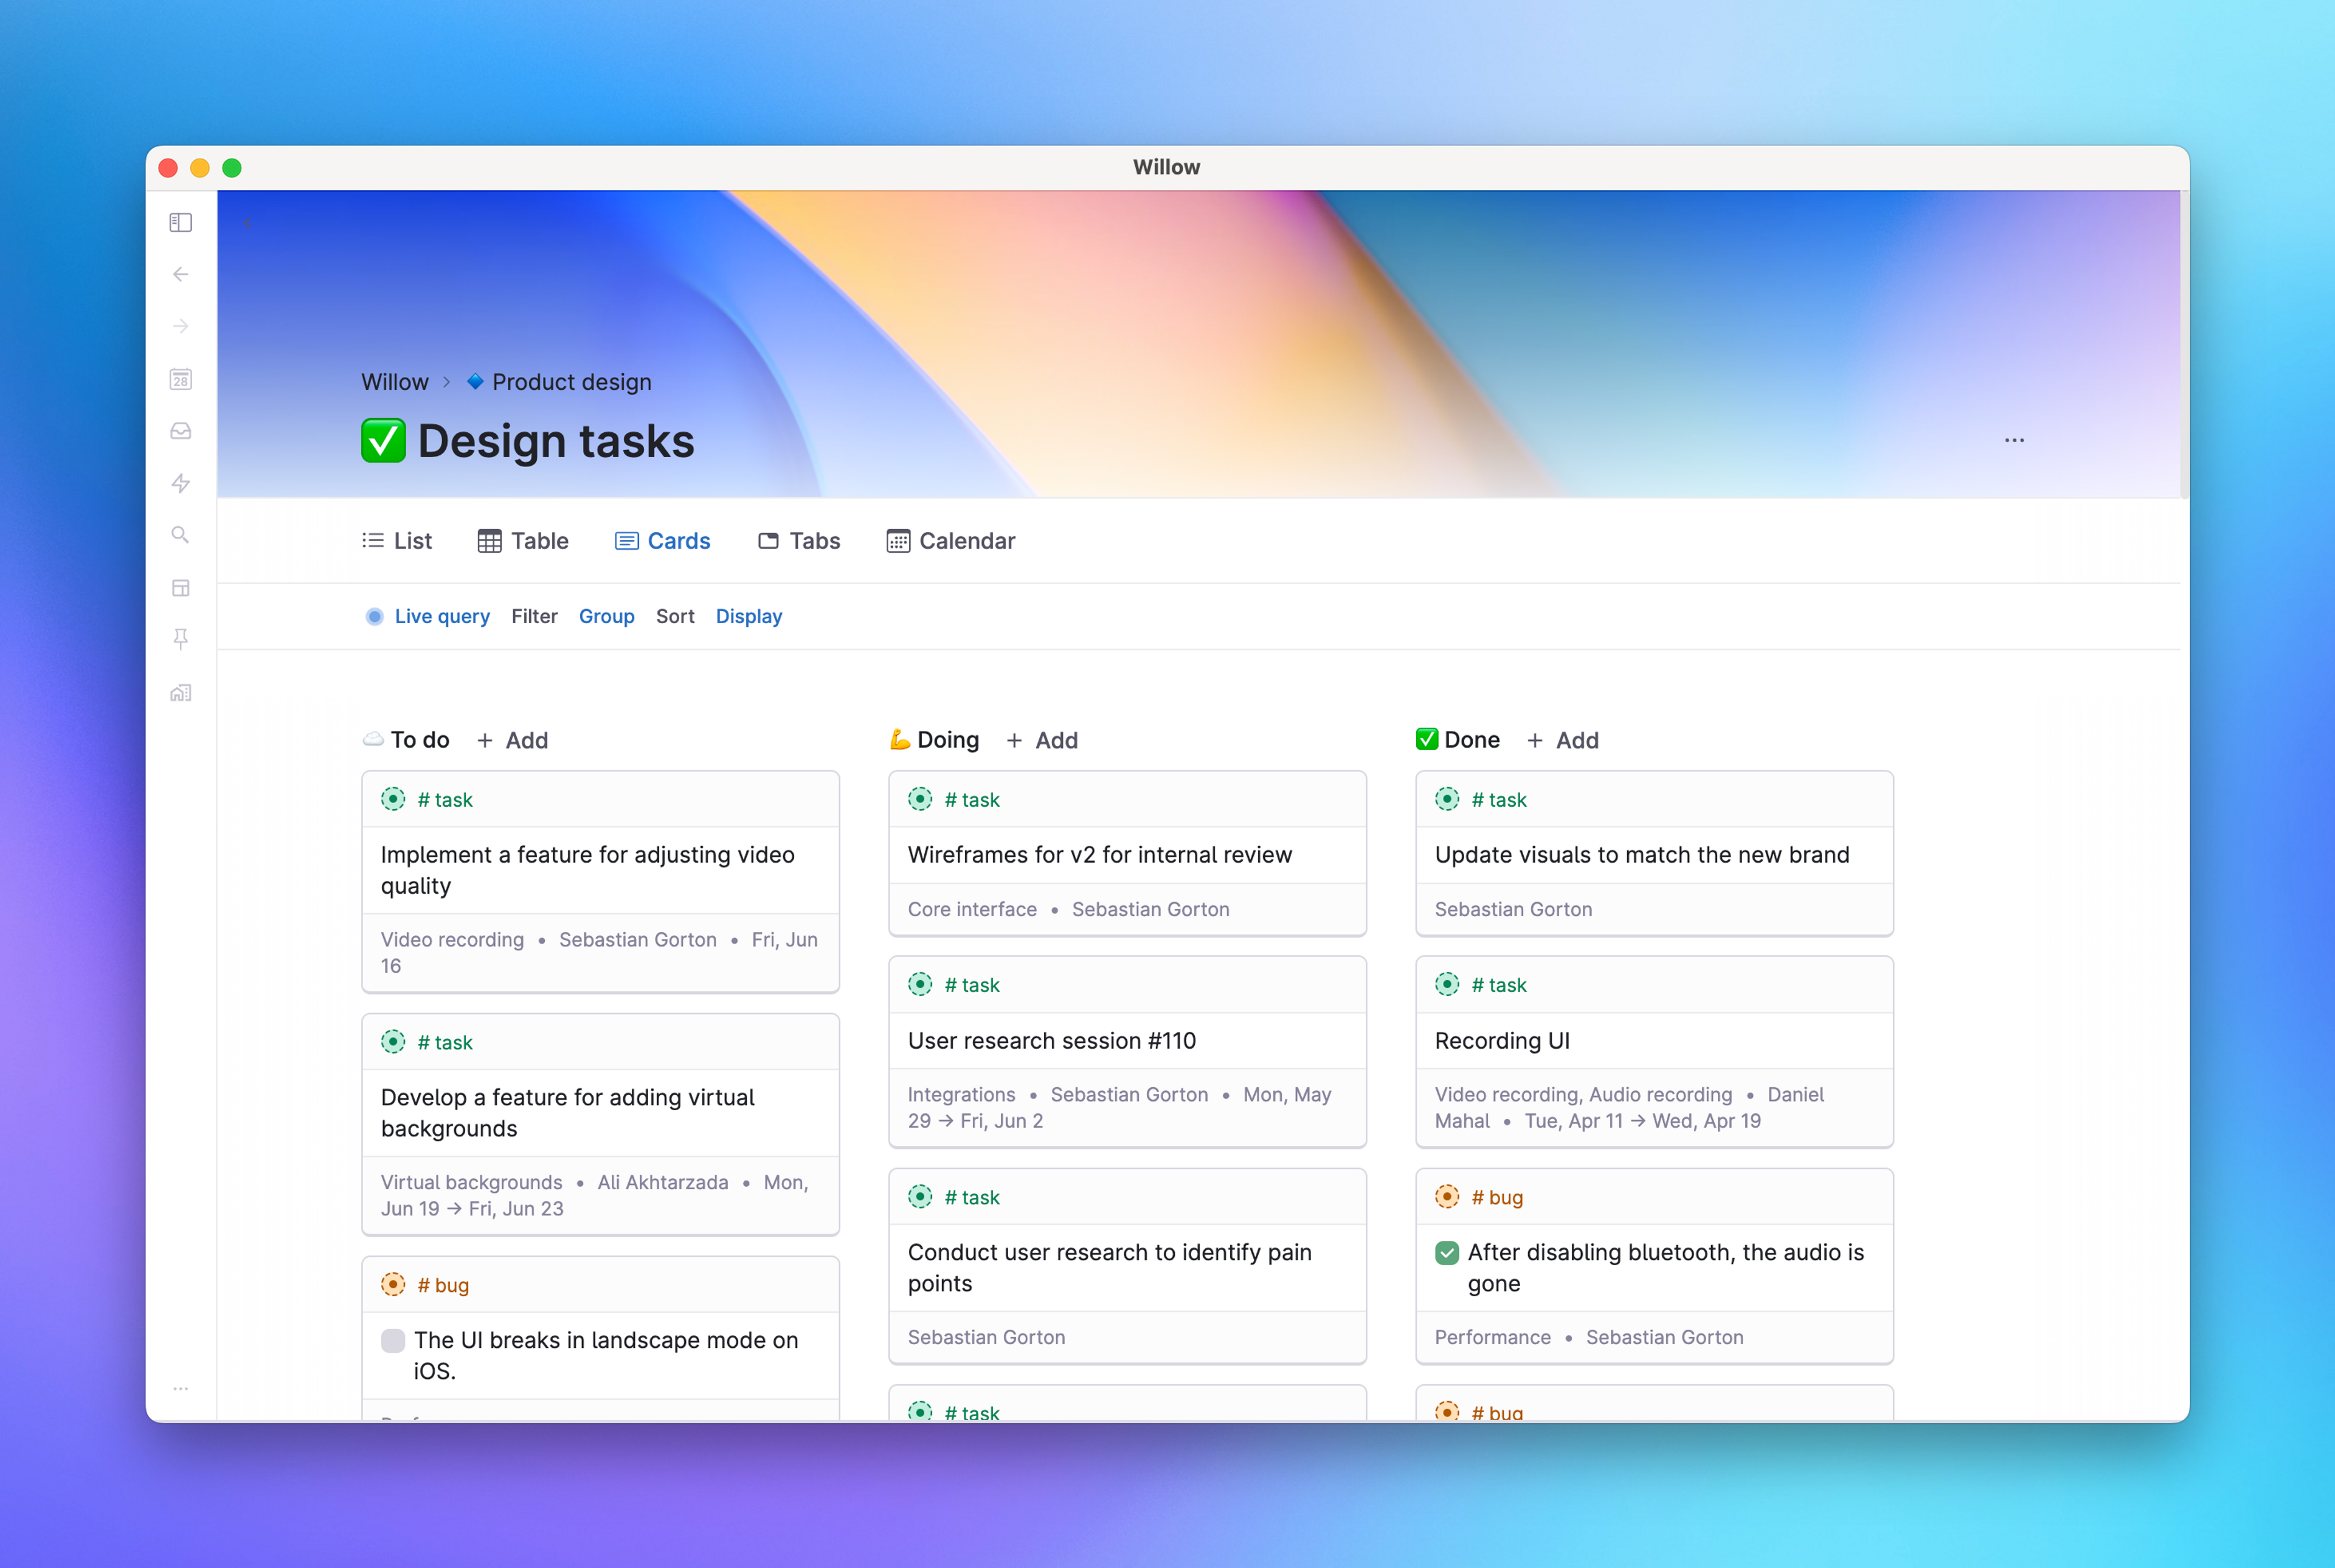
Cards view
Cards show each child nodes as a card.
Add child nodes via the +Add button.
Group by a field that contains data like Status, Dates, or Categories will arrange the cards in grouped columns, and you can drag cards between columns to change their Status, Date, or Category.
Use Display to choose which fields are always shown on the bottom of the card. If a field contains an image, the image will fill the bottom of the card.
Available View options:
Tabs view
Tabs show each child node as a horizontal tab on the top that you can click to see its contents.
Add child nodes via the +Add tab button at the end of all the tabs.
Move menu items around using the usual shortcuts for moving nodes up/down: Cmd/Ctrl+Shift+Arrow up/down
Each child node can have their own view options applied to show their contents differently.
Applying Filter settings will change which tabs show up on the top bar.
Available View options:
Calendar view
The Calendar view has three different time granularities: day, week and month.
It looks for a date field in each child node and plots it in the month/week/day view.
Add child nodes by clicking in the calendar and creating a new entry.
Flip between month/week/day by using the navigation arrows on the top right of the view. The calendar symbol in the middle takes you to Today's date.
Child nodes without date information are set aside in a list called "[number of] nodes with no date >" at the bottom left of the calendar view. You can drag-n-drop these nodes into the calendar and this will add a date to an existing date field, or add a system date field if none other date field exists.
Child nodes with two or more date fields will show in the calendar twice. You can control which dates to use in the "Date fields" view option.
Available View options:
- Filter
- Date fields: Choose which date fields to turn on/off for all child nodes.
- Day length: Choose the time range for agenda views. Default is 00:00 -> 24:00.
- Display
Side menu view
Side menu shows each child node as a menu item to the left that you can click on to see its contents.
Add child nodes via the +Add button.
Move menu items around using the usual shortcuts for moving nodes up/down: Cmd/Ctrl+Shift+Arrow up/down
Each child node can have their own view options applied to show their contents differently.
Applying Filter settings will change which items show up on the menu bar.
Available View options:
View options
Filter
- Available for all views.
- A quick way to filter child nodes based on certain requirements.
- Filter by title: Enter text to filter nodes based on matches in node titles. Doesn't look at field values or node contents.
- Field names: Filter nodes based on their field values.
Group
- Available for List and Cards view.
- Allows you to group nodes based on values in user-defined fields or system fields.
Sort
- Available for List, Table and Cards view.
- Lets you to sort child nodes based on any user-defined field or system field, in ascending or descending order.
- Press the +add sort button to further apply sort criteria. Tana prioritizes sort requirements from the top going down the list.
- Remove sort settings by pressing the minus button to the right of each sort.
- Making changes to sort may require you to hit the Reapply sort button to see changes.
- Hit the Reset button to remove all sort settings.
Display
- Available for List, Table, Cards and Calendar view.
- Lets you pick which fields you want to have values displayed from.
- Values are displayed in the same style as Node descriptions: smaller grey font under the title of the node.
Related release notes
- fixedBrought back the 'Display' option on Table view (we were wondering when someone was going to notice that it was gone!) ()
- improvedView toolbar and filtering overhaul out to all. ()
- fixedFixed bug where discarding view options and then undoing would cause a crash ()
- improvedWhen we apply grouping on tags, if there are several we now look at the first set tag. ()
- fixedFixed lost spacing in title expressions when viewed as cards. ()
- improvedYou can now drag and drop to reorder tabs. 🤗 ()
Related FAQs
- How can I configure the view of a search node that exists in a supertag template? It's not showing me all options.
Problem
The query doesn't run in the template editor and so there are no search results available with which to set sort or group options.
Until we have fixed this issue, this is a workaround that has been perfected by community member Darren Brierton (this is part of the new series called Darren's Frequently Answered Questions, or the D'FAQ if you may).Answer
- Create the search on the actual node, and adjust its options there.
- Then, open Filter and fill the text filter with gibberish (like "
xyjzkwq") so the search node returns zero results - Then, cut and paste (Cmd/Ctrl+X / Cmd/Ctrl+V) the search node into the supertag template
- Expand the node, and remove the gibberish text
Are the gibberish text instructions necessary?
The reason why the filter instructions are needed is because it prevents stale results from being copied over to the supertag template.
Thank you Darren for drafting these thorough instructions until we sort things out!
Related docs:
- How does the "Set view definition" command work?
There is a command called
Set view definition. It can set the Group, Sort and Display settings of a node view.There is no good UX for this at the moment, so the instructions are not conventional nor friendly for beginners. But right now, this is one way of doing it:
- Mock up a node that will have sample child nodes representing the data you'll be applying this command on
- Then, create the exact view settings you want with Group, Sort and Display.
- Go Cmd/Ctrl+K > Debug Node on the parent node and look at Views for node:
- Clone the fields over to the command node so it looks like this:
When you run this command on a node, this should change the view settings according to your configuration.
Related docs: